Faux No Line Water Color Using Peerless Paints

Wow!  Has it really been three months since my last post?  Where has the time gone?  Wedding and baby season definitely keeps me super busy every year.  With that season finally coming to a close, now I can focus more on keeping my blog updated with cool new techniques and beautiful crafts.

Today I wanted to show you a simple Thanksgiving card I made using Peerless watercolors.

IMG_3332
This is the Peerless Watercolor booklet. The “Complete Edition” is a misnomer, there are more than 40 other colors available!

If you have never used these water colors before, I highly recommend trying them.  They are super easy to use, come in bright colors, and very inexpensive.  (I got this booklet at my local paper crafting store for around $15.)  As a bonus, they blend absolutely flawlessly, so they are perfect for no fuss painting.

IMG_3333

The colors come in sheets or in liquid form.  Each sheet of pigment has a corresponding page with the color name and some ideas on how to use the color and what other colors to mix it with.  Refills for the booklets are available.

There are many ways to use the Peerless watercolors, but I like to just snip off a small IMG_3357piece of each of the colors that I would like to use.  You can put each little section in a small dish, but I just line them up on my glass cutting mat.IMG_3364

Next I touch a wet brush to the square to pick up some of the color and simply paint!

IMG_3368Picking up the color doesn’t take much water, and it goes very far.  You can keep using the small squares pigment for quite awhile before all the color is exhausted.

IMG_3371
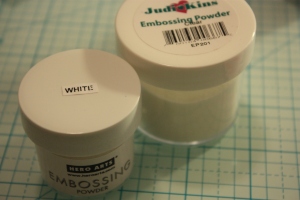
You can use clear or white for this technique.

For this card I wanted to do a no line watercolor, but I do not have a very steady hand, so I decided to fake it with some clear embossing powder.  The watercolor will resist all of the areas that have been embossed, so it’s okay if you go outside the lines!

First, I embossed the Scarecrow from Lawn Fawn’s “Happy Harvest” in clear embossing powder.  I painted it in with: brilliant yellow, flesh tint, Japonica scarlet, Mahogany brown, Sepia brown, and sky blue from the Peerless Complete Edition.  I used the Peerless Metallic in Copper for his buttons.  Next, I stamped the corn stalk from the stamp set and embossed it with yellow embossing powder.  I colored the background with distress inks (Victorian velvet, squeezed lemonade, and fossilized amber).

I wanted my sentiment to IMG_3346follow the curve of the cut circle I was using so I laid my acrylic block over it and simply curved the sentiment as I mounted it to the block.

IMG_3350

I embossed the sentiment in Metallic Copper embossing powder to match the copper in the scarecrow’s buttons.

IMG_3349
Look at how beautiful and shiny it is after embossing as compared to before!

I adhered all the pieces on some gorgeous embossed wood grain paper I got from my local paper crafting store and added a ribbon.  Super easy, and very cute!

For more information on Peerless Watercolors, check out their website.

If you would like to try out any of the products I used on this card, check out the links below!

Thank you for stopping by!

(Please note that while I do receive compensation from Amazon for items bought through the following links at no extra cost to you, I never recommend products that I don’t use and love myself!  I was not asked by Amazon or any of these companies to use their products or provide these links.):

Peerless Watercolors

Silver Brush Round 4

Lawn Fawn- Happy Harvest

Distress- Victorian Velvet

Distress Squeezed Lemonade

Distress Fossilized Amber

Judikins Clear Embossing Powder

Anti-Static Powder Tool

Lawn Fawn Watercolor Card

Hello friends!  Today I have a super sparkly card to share with you.IMG_2475w I made this card for the Lawnscaping Challenge: Sparkle and Shine challenge.  The stamp set I used is Lawn Fawn‘s “Color My World”.  I have had this set for a while and had yet to use it, so this seemed like the perfect opportunity!

IMG_2463wI used a scrap piece of Pow Glitter Paper for the front of my card and different colors of solid scraps for my crayons.  I black heat embossed the crayon image onto the scraps and fussy cut them out.

I then used my yellow Derwent Inktense pencil to draw a very light outline of where I wanted my color splashes.  I used an Inktense pencil here because I wanted the line to fade away when I did my watercolor painting.  If I had used a regular lead pencil for the outlines, the lead would have become “trapped” under the paint and I would not have been able to erase it. IMG_2450w I didn’t want to be stuck with gray outlines.  Eek!

Finally I carefully painted in the different areas with my shimmer paints.  I made sure not to overlap any of the paint where the different colored areas met because I didn’t want the colors mixing.  The paints I used for this card are very inexpensive shimmer paints that I bought at my local paper crafting store, Impress.  You can find these paints here.

For the sentiment on the card, I just used the one that came with the set and heat embossed it in Liquid Platinum IMG_2493wembossing powder from Ranger.  I love this embossing power, it has a beautiful sheen but isn’t too over powering since I didn’t want to loose focus from my watercolor background.

To finish the card off and to make it extra sparkly, I went over the tips and ends of the crayon images with my clear Wink of Stella brush pen.  This made the images look like sparkly crayons wrapped in regular paper.

IMG_2447w IMG_2481w

Here are a few close-ups of the pretty sparkles! I love the look the Wink of Stella brush pens give without being so messy!  Quick and Easy.

I hope you guys liked this card and thank you so much for stopping by!

Here is a list of the materials I used to make this card. (Please note that while I do receive compensation from Amazon for items bought through the following links, I never recommend products that I don’t use and love myself!  I was not asked by Amazon or any of these companies to use their products or provide these links.):


Color My World Stamp Set

Inktense Pencils

Pow Glitter Paper

Ranger Liquid Platinum Embossing Powder

Tim Holtz Watercolor Paper

Lawnscaping Challenges Blog Hop

Badge
Welcome to my stop on the Lawnscaping Challenge Blog Hop!  This blog hop is dedicated to a very dear friend of mine…coffee.  So pour yourself a cup, sit back, relax and happy hopping!  You probably found your way here from the Stampn’HI blog.
If at any point you find yourself lost during this hop, here is the Blog Hop order:

Also remember to check out the Lawnscaping Challenges website.  The Lawnscaping Challenges website is packed with information on our generous sponsors along with how to win some great prizes.


SPEAKING OF PRIZES…  Winning prizes on this hop is super easy, all you have to do is leave some great feedback and comments on the blogs featured in this hop.  Since you wanted to do that anyway, why not get rewarded for it?  Just leave a unique comment (don’t copy and paste the same comment on each blog) down below for your chance to win.  You have until the end of the day on June 28th (11:59PM EST) to get your comments in.  Winners will be announced on the Lawnscaping Challenges blog.


For my project I did a going away card for a coworker who got promoted.
0519152238
I made a custom sentiment “We will miss you a latte” by selectively inking one of the sentiments in the “Love You a Latte” stamp sets.  I decorated the background by repeatedly stamping the cute little bean from the stamp set in different directions.  I distressed the background so it looked like it had coffee spilled on it and a coffee ring.  I made the coffee by putting some wet distress ink on a circle die and pressing it on the paper.

Thank you to our amazing sponsors for not only inspiring our crafting but also supporting this blog hop.  Remember to check them all out: there’s Lawn FawnEllen HutsonThe Ink Road, Crafters CompanionSpectrum NoirThe Alley Way StampsNewtons NookFaber Castell, and Right at Home!
Sponsor Badge
If you encounter any errors along the hop, please email Laurel directly at laurelbeard at me dot com. Please do not leave them in the comments.
Thank you so much for stopping by and enjoy the rest of the hop!  Next up is Mel’s Card Corner.

Operation Write Home: Finishing Strong

finishingstrongbadgeOperation Write Home, a charity that has supported heroes with handmade cards since 2007, will be closing later this year. All cards need to be sent in by August 1st, so I’m helping to get the word out!


I was inspired by this Pretty Pink Posh sequin mix.

The theme for the Finishing Strong blog hop is appropriately “Red, White, and Blue.” Instead of going with a traditional navy blue, I chose to be a little different a use a more teal blue.

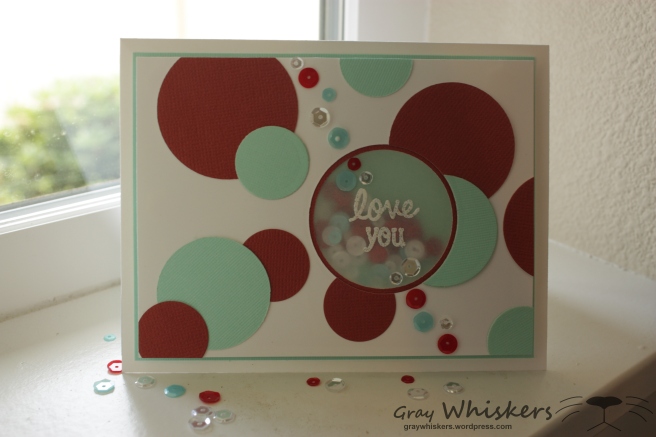
I made a simple shaker card with cardstock that coordinated with the sequins.  I used velum for the shaker window and embossed the sentiment on it.  IMG_2356wIMG_2331w

This card fits perfectly with the Operation Write Home “Love Cards” theme.IMG_2359wWhile you are making cards to send to Operation Write Home, please make sure to stick to their guidelines.  We want to ensure as many cards as possible get to our Heroes overseas.

Let’s help Operation Write Home get the word out to as many people as possible!  Like and share the posts in the blog hop, and get your cards in by August 1, 2015.  Let’s make the “Finishing Strong” campaign a success!

For more information on Operation Write Home, visit their website.  To start at the beginning of the hop, click the banner at the top of this post.

Tutorial: Interactive Spinner Card

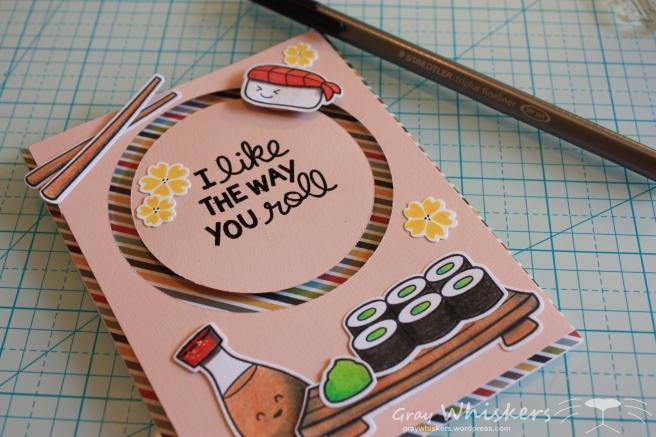
Today I wanted to share with you how I made this cute spinner card featuring one of my favorite Lawn Fawn stamp sets, “Let’s Roll”.

IMG_2158w


IMG_2091wHere are the materials I used for this card.  (Please note, while I do receive commission from Amazon for items bought through the following affiliate links, I never EVER recommend products that I don’t use and love!  I was not asked to use any of these products by the companies that make them.)


Okay, let’s roll!

First make the card base and prepare the background pieces.

IMG_2099IMG_2103

Cut an 8.5″ x 11″ piece of white cardstock in half (8.5″ x 5.5″) and score at 4.25″.  This will give you two A2 sized cards, use one on your next project.

IMG_2117wTrim the patterned piece to 4.25″ x 5.5″ to perfectly cover the front of the card base.  Trim the light pink piece to 4″ x 5.25″ to leave a small mat around the edge of the card front.

Now it’s time to make the track for our sushi friend to spin around in.

Cutting both dies at the same time is the easiest way to get a perfect circle all the way around.

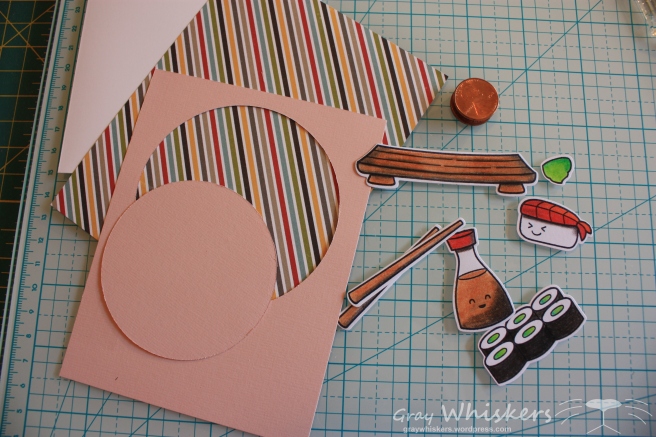
Place two consecutive sizes of circle dies where desired on the front of your light pink piece. Keep them in position with some low tack artist tape, or washi tape.IMG_2120wAfter cutting you are left with a card stock circle that fits perfectly inside the larger piece with a 1/4″ track all the way around.  Save the waste piece to use as a frame for another project.

Next, stamp your images.

IMG_2124wUsing your black dye ink, stamp your images onto a piece of plain cardstock.

To save time, put more than one stamp on your acrylic block.

Once all of your images are stamped, it’s time to start coloring!!

IMG_2125w

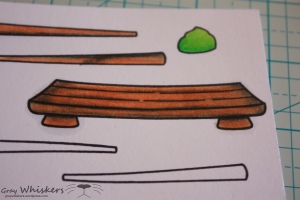
Use your favorite coloring method to fill in the images.  You can use alcohol markers, water color paints, or colored pencils.  For this card, I chose my Derwent Inktense pencils and gamsol.  These pencils blend beautifully and have great coverage.

Before blending.
Before blending.
After blending.
After blending.
IMG_2143w
Collect all your pieces and get ready to assemble!

And finally, assembly!

Using the coordinating dies, cut out all of the images you colored.  Place a circular foam dot between the two pennies to create the base of the spinner.

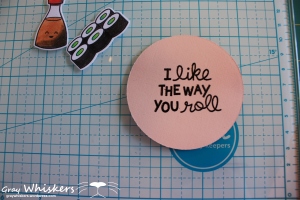
Emboss the sentiment.

To finish putting the card together, adhere the pattered cardstock piece to the card base.  Then, adhere all of the elements to the solid cardstock piece.

I decided to add some yellow flowers to fill in some of the empty space on the card

Using foam tape, pop up the solid card stock piece and the circular piece on the front of the card.  Glue the sushi piece to the pennies and tuck into the track.IMG_2152wAdd some glossy accents to the lid of the soy sauce (or even the whole bottle if you are ambitious) and some liquid pearls and you’re done!

I am not affiliated with or compensated by Lawn Fawn I just think their stuff is awesome!  For more information on Lawn Fawn and their adorable stamp sets, check out their website and blog.